The backlight on my iPhone 6s is not lighting up. The screen is black but will accept touch input.
If the backlight not working on iPhone 6 plus due to damaged screen cable, you may need to fix the backlight. It may also be that iPhone backlight not working after water damage.


1. Adjust the screen brightness. If the screen is not dark completely, go to Settings - Brightness - Push the slider to the right to brighten the iPhone screen.
2. Try to disassemble the screen, clean the screen flex cable, and then wipe the back of the screen with a dry cloth.

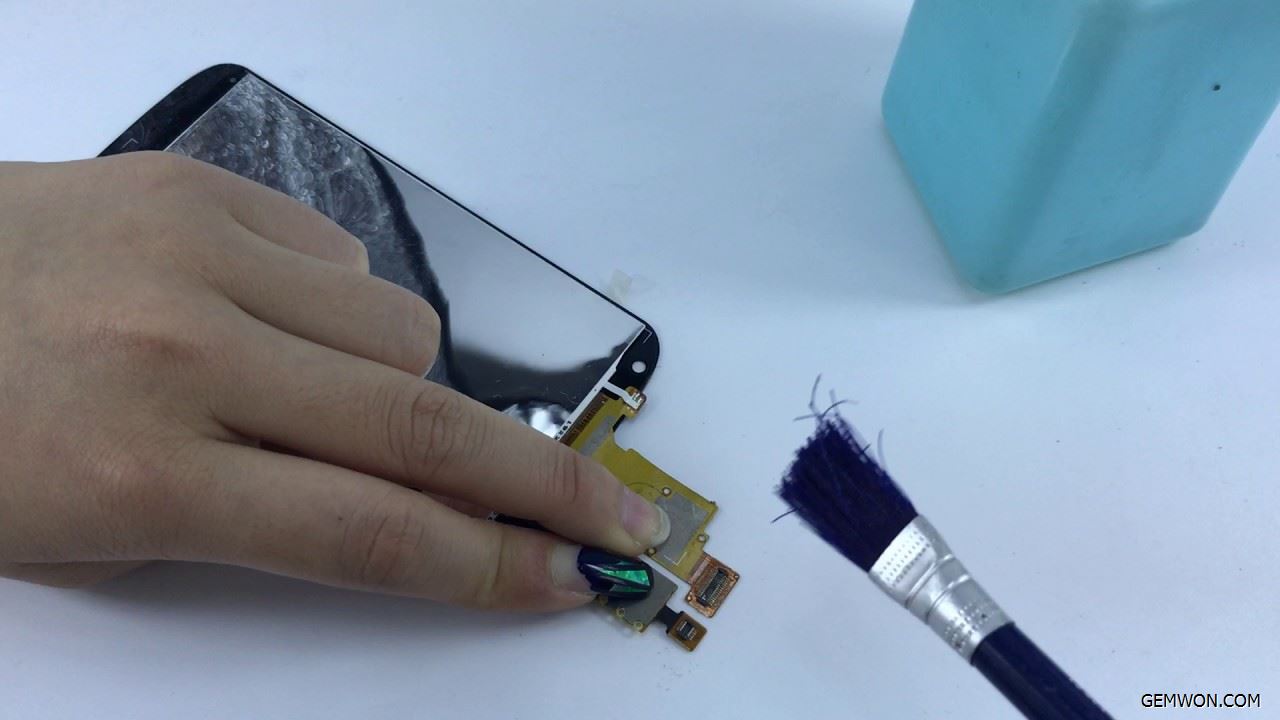
Unplug the camera/speaker cable and retest.
For some reason, often lead to a short circuit between the camera bending and the backlight. When the camera flexible cover is in place, the small black tab tightens and clings the cable assembly,and you must make sure it is straight. If the long rectangular chip is in contact with the component, it will cause a short circuit.
Why is my iPhone backlight not working
The backlight can create defects and compromise the quality of the screen display that appears. If there are significant color differences, lines or spots on the screen, the iPhone 6S Plus backlight may be defective. Try to repair the backlight circuit.
How to fix iPhone display light not working
You will need to replace the screen to fix the iPhone display light not working:
- The screen brightness is very low and the screen can only be seen under direct illumination.
- Screen flickering.
- The display brightness is constant and cannot be adjusted.
1. Turn off the iPhone power before starting disassembly.
Remove the two 3.6 mm screws next to the Lightning port.
2. Use a suction cup to lift the front panel.
3. While holding the iPhone with one hand, pull up on the suction cup to separate the front panel assembly from the rear case.

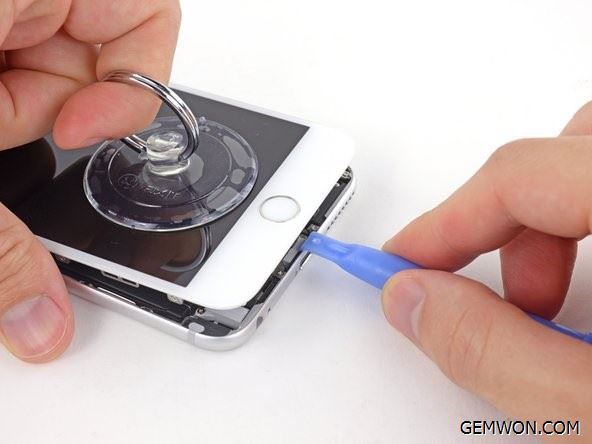
4. Using the plastic opening tool, begin to pry down the rear case away from the display assembly
5. Remove the suction cup from the display assembly.
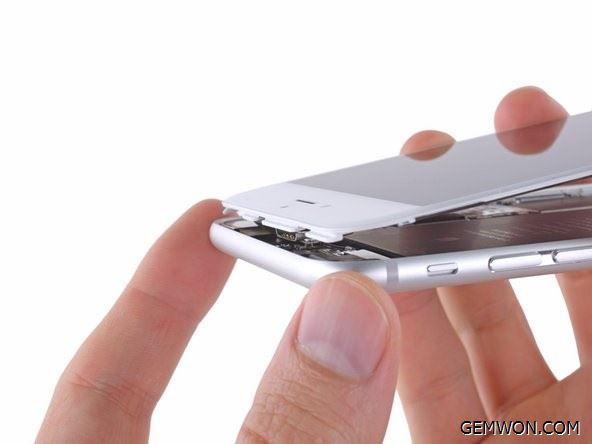
6. Using the top of the phone as a hinge, pull the home button end of the front panel assembly out of the back cover.
7. Several clips along the top edge of the front panel form part of the hinge, allowing the front panel assembly to swing open like a book.

8. Remove the following Phillips screws from the battery connector bracket.

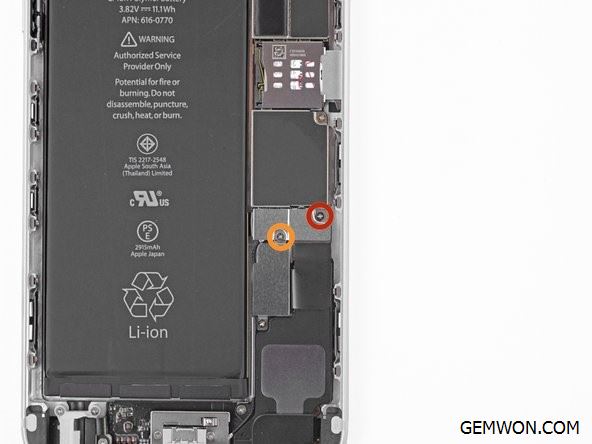
9. Remove the metal battery connector bracket from the iPhone.

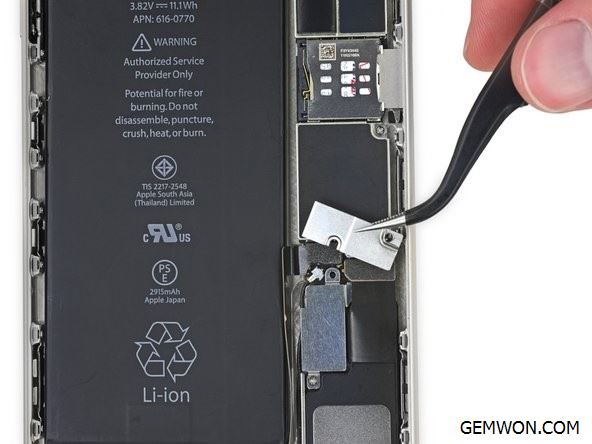
10. Using the edge of crowbar, pry the battery connector out of the socket on the logic board.

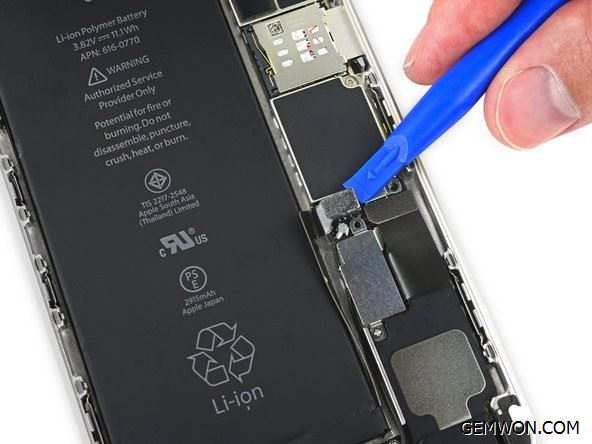
11. Remove the Phillips screw that secures the front panel assembly cable bracket.

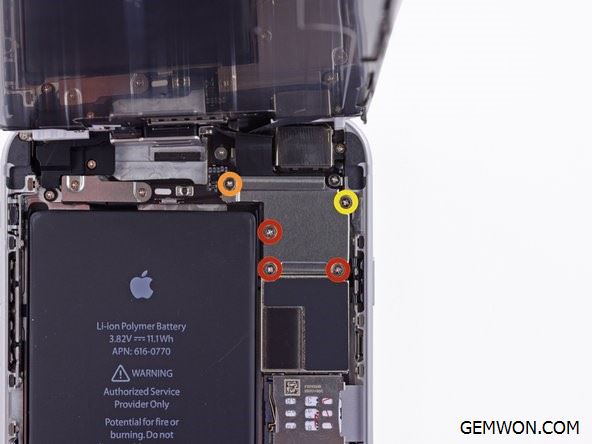
12. Remove the front panel assembly cable bracket from the logic board.

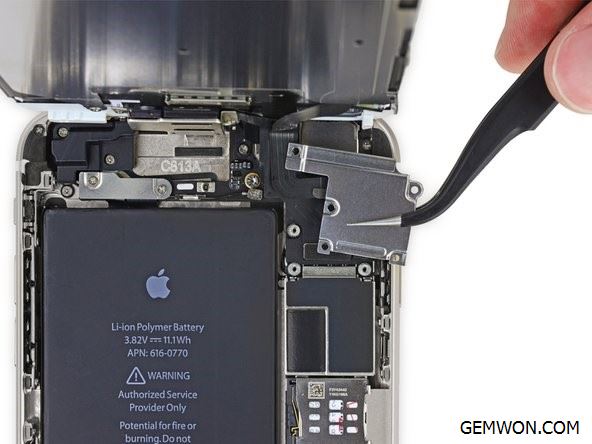
13. Use the edge of the open tool to disconnect the front camera and headphone speaker connectors.

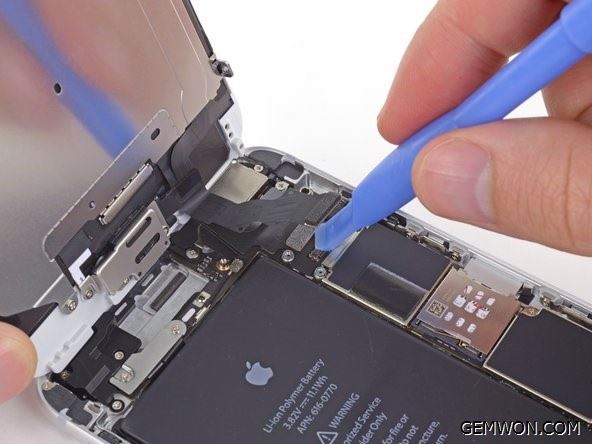
14. Disconnect the home button cable connector.

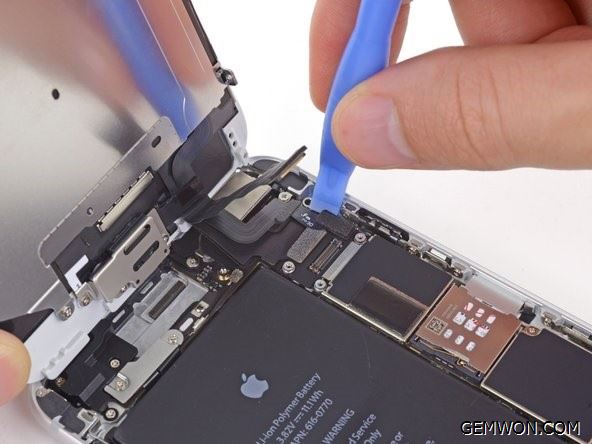
15. Disconnect the monitor cable connector using the plastic crowbar.

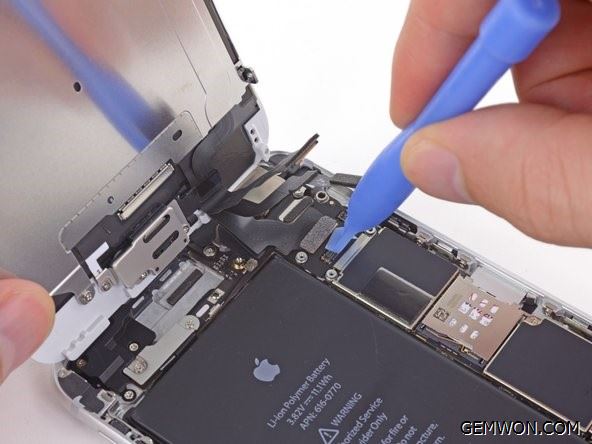
16. Disconnect the digitizer cable.
17. Remove the front panel assembly from the back cover.
18. Remove the following screws that secure the upper assembly bracket.

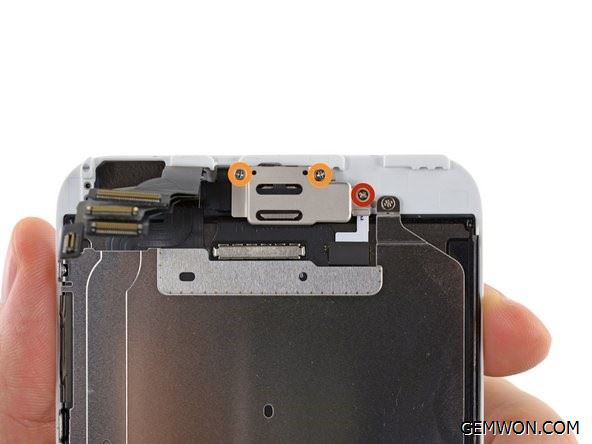
19. Lift and remove the speaker holder from the display assembly.

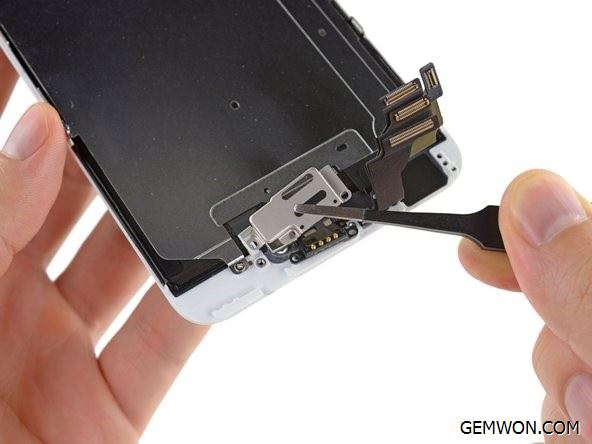
20. Use the flat end of the crowbar to pick up the front camera and monitor cables and gently push them aside.

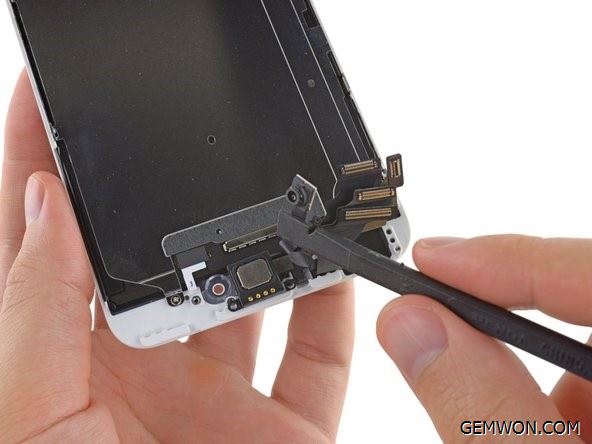
21. Remove the speaker from the display assembly.

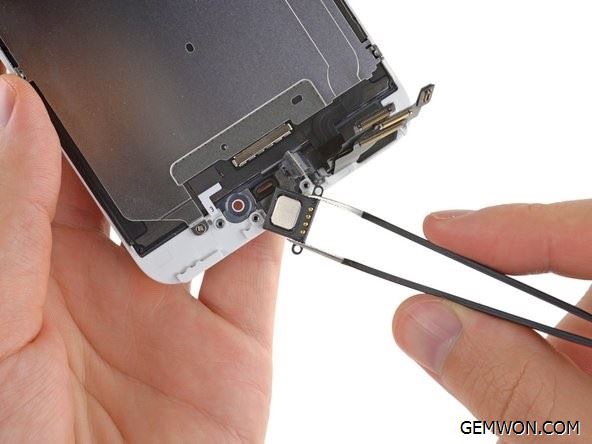
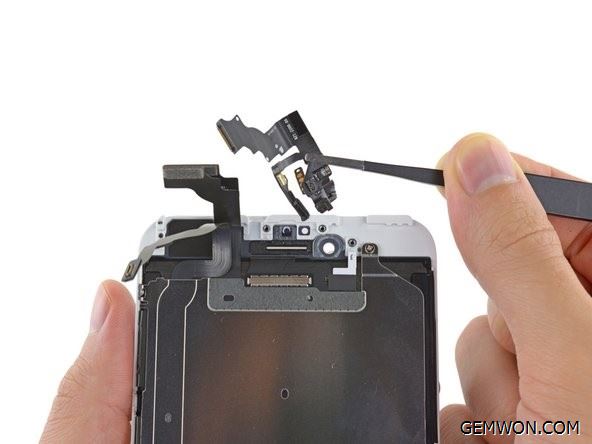
22. Pick up the sensor cable assembly from the groove in the sensor cable assembly.
23. Remove the microphones of the front camera and sensor cable from the display assembly.

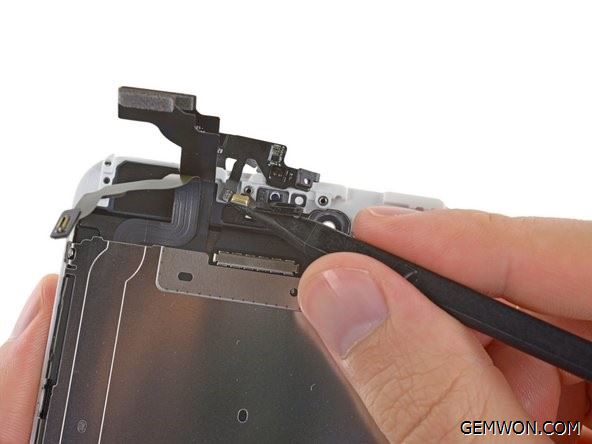
24. Remove the front camera and sensor cable assembly from the display assembly.

25. Remove the two 1.8 mm Phillips screws that secure the home button bracket to the front panel.

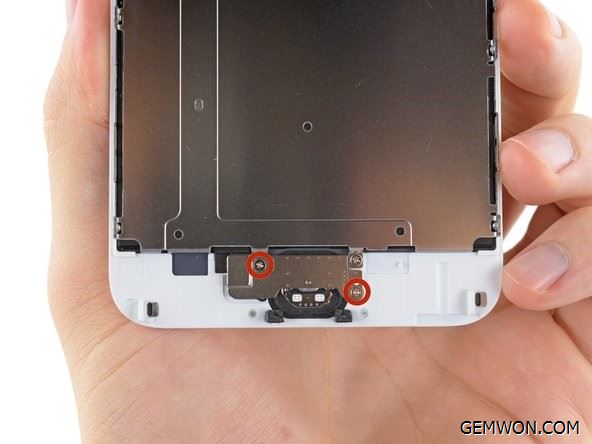
26. Remove the home button bracket from the front panel assembly.
27. Disconnect the home button connector from the socket on the home button cable.
28. Separate the home button connector cable from the adhesive and secure it to the front panel assembly.
29. Soften the adhesive that secures the home button gasket.
Use your fingertips to gently press the Home button on the front of the display unit. slowly separate the adhesive gasket on the Home button from the front panel.
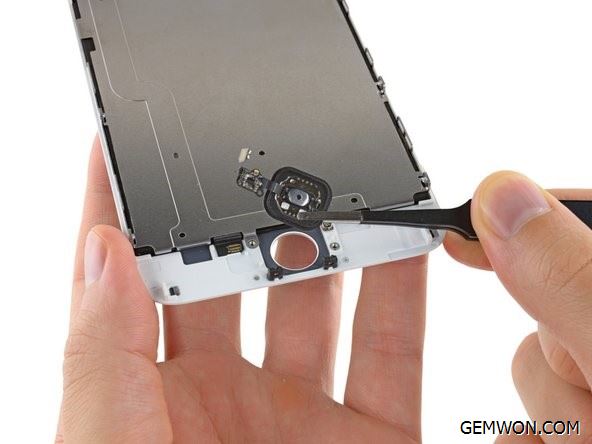
30. Complete the separation of the home button from the front panel.
31. Lift and remove the home button assembly from the front panel assembly.

32. Remove the two 1.7 mm Phillips screws and secure the LCD shield plate to the display assembly.

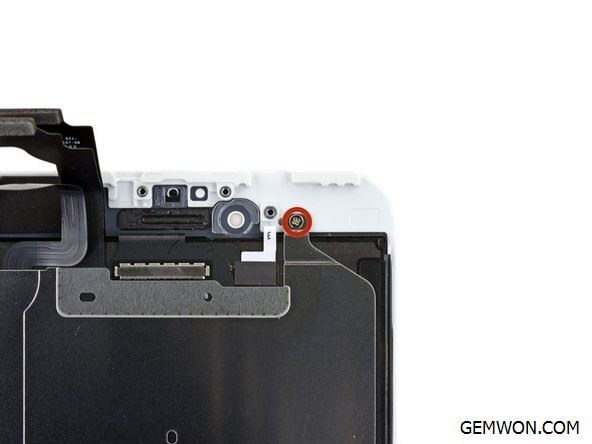
33. Remove the three 1.3 mm Phillips screws from the sides of the LCD shield plate.

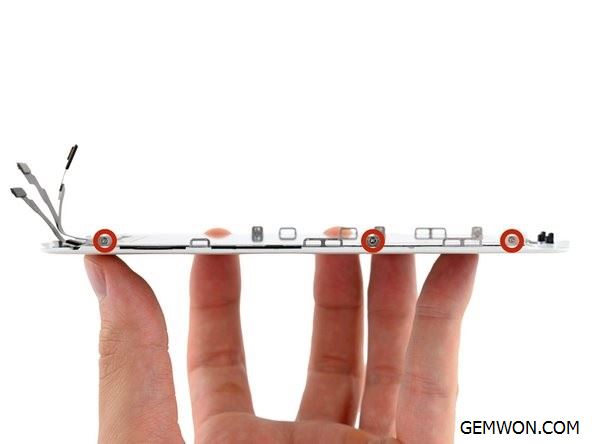
34. Remove the LCD shield plate.
35. Gently lift the other end (closest to the Home button) and peel the Home button cable from the display assembly.
36. Remove the LCD shield plate from the display assembly.

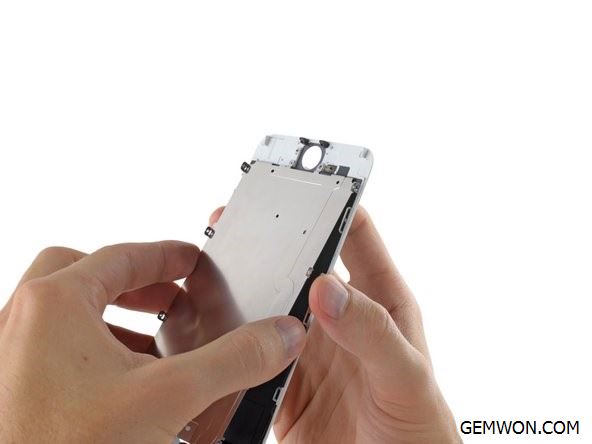
37. At this step you can replace iPhone 6 Plus LCD and Digitizer.
You need to transfer multiple components from the old screen to the new screen before installation -including the front camera, headphone speakers, LCD shield and home button components. Or you can purchase the corresponding iPhone repair parts & iPhone screen assembly from GEMWON Phone Parts.
The Bottom Line:
The above steps will help you replace the iPhone LCD screen and digitizer components to solve iPhone backlight not working after screen replacement.
RelatedArticles:
How to Fix iPhone Screen from Dimming
What to Do with a Broken iPhone 6S Screen Replacement
How to Fix iPhone 6 Touch Screen Not Working